Wednesday, December 30, 2009

Viva La Zimmermann!

I have been inspired to get to know the work of the great Elizabeth Zimmermann.

I started my adventure by making the original "Baby Sweater on Two Needles" (which is just a small fraction of the knits La Zimmermann had on her slate for that short month...)

I do not know who will get this. Perhaps the new daughter of my friends Kelly & Marco...
I made this little sweater in dishcloth cotton. It IS worsted... Plus, I wanted to see if it would work. I already had my sights on the adult sized project & I knew I could not afford a decent quality wool or other worsted for that.

So... Two cones of varigated Onward to the February LADY sweater!
I really appreciate this adaptation of a Zimmermann Classic.

I really enjoyed watching how the space-dyed color repeats & patterns played out through the sweater. I was forced to use two different dye lots on this project, but it worked out that I was able to do the body of the sweater with one ~800 yd. cone (It took EXACTLY one) & the sleeves with the other. It was luck which made it work, I know. But, I'm quite grateful for it just the same.

The Gull Lace pattern is just simple enough for meditative knitting, but just complicated enough to keep you motivated to finish each step of the 4 row repeat. It is super fast to complete when knitting in the round for the sleeves on the adult sweater.
Any errors are quickly spotted & fairly easy to repair if you catch it in the return row. This is NOT usually the case for lace patterns, simple or otherwise.

It is the subtle elegance of such things that is the root of my deep regard for Elizabeth Zimmermann. She was clearly not into wasted motion, yarn, or even thought. At first sight, her work might look dated, or even clunky... If that's what you think, then I invite you to look more closely. Yep. Knit your way through her "non-patterns" & you'll be astonished by the unassuming brilliance.

Even if the Baby Surprise Jacket is not to your taste (& there's no accounting for taste, nowadays) the elegance of the concept is enough to make an architect applaud.

Check out this designer's blog to see her Zimmermann research & subsequent inspirations & designs! Very snazzy stuff, no?

The February Lady Sweater pattern by Pamela Wynne (from Flint Knits) is available as a free ravelry download. It is a justifiably celebrated rite of passage for anyone who wants to really know what the "big deal" is about knitting your way through the Almanac.

Originally, I thought I was going to knit this for myself. I really did!
Well... as I got underway, I knew it was not for me, really.
This ended up a perfect Christmas present for my own sweet Mother!
She has spent years making sweater upon sweater for everyone else. It is more than her turn!
I think I'm going to start a tradition where each Christmas I make a new sweater just for her...
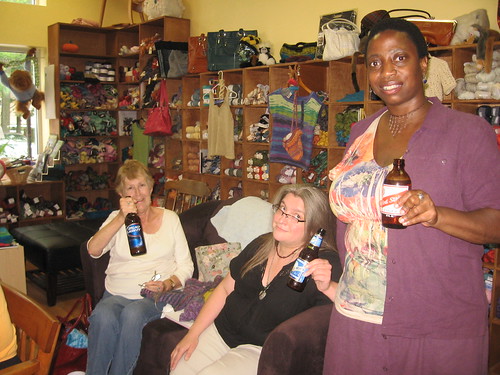
Last year was the Nantucket Jacket by Norah Gaughan from the fabulous Interweave Knits Winter 2006 (If you are observant, you can see it folded on the back of the chair)... I wonder what next year will be?

Tuesday, December 29, 2009

Who Ya Gonna Call? Stash Busters!


Here's the best little stash buster I've seen in the longest!
I'm so happy to share it...

Here is the original cozie pattern:

http://myknittingbasket.blogspot.com/2009/11/owl-coffee-cup-cozie.html

I had a bunch of 30-40 yd. remainders from all my Koolhaas Hats, etc.… & Christmas was COMING!!! I needed to make some seriously QUICK gifts... which could be taken seriously.

I love the classic Cable Owl Motif & I really enjoy this knitter's take on it.

There's even a wonderful free pattern which adapts it for a hat :

http://penguinpurls.blogspot.com/2008/12/who.html

There's even more to find using this simple, yet fabulous, cable on Ravelry...

Does anyone know where it began? I remember seeing it in my Mother's old pattern books, but I just can't remember which one... It was a pattern for a little girl's sweater. Hmm...

I worked up another version which tweaks the ribbing sequence to match up perfectly with the Owl Motifs. The subsequent decreases also allow for a k2tog on the right “ear” & a SSK on the left to finish it off well before the ribbing resumes.

Awwww… GEEK OUT! I suppose I can't help it. Hope my compulsive tics help y'all:

To make the Owl Cable Motifs & the ribbing sync up, I changed the count to 50 on the cast-on with a (P2, K2, P2, K4) repeat.

Using smaller DPNs (size 5), I increased thus: (P2, M1, K2, M1, P2, K4) =60 sts

I switched to the larger DPNs (size 7) & did the Owl Cables as written.

Using smaller DPNs, I decreased thus: (K2tog, K4, SSK, K4) = 50sts

I finished with 5 rows of (P2, K2, P2, K4) & BO in patt.

I still don’t know where I’ll find those funky googly eyes the designer used...

I really wanted to use buttons for the eyes.

In the end, I decided to embroider eyes. It’s a little fussy & labor intensive… But, I prefer the look to what eye-options were available to me.

Look out Stash!

These make great gifts & the wool really DOES work better than the little disposable sleeves you get & then toss away.

Sunday, December 6, 2009

Sorry, I've been stitching... just not posting!

Between Sam & teaching, I've just not had any time to post anything about what little stitching I've been able to accomplish!

So here's a little update:
Amigurumi MADNESS!!!!

Yep... It is still no secret I'm not fond of the crochet process.
However, the product is so irresistibly cute, I cannot help it!

I've been making & adapting pattern basics from this imaginative but basic book:

Kyuuto! Japanese Crafts Amigugmi by Tomoko Takamori

Non-crochet & visual learners will love the icons which are used instead of initial abbreviations in her design instructions.

The first was the Duck:
I did not care for the legs in the pattern, so I designed some "flipper feet" (an easy pattern will follow, but I've mislaid the post-it I used for notes).

I showed it to my Art Class at school to gauge interest for an after school crochet workshop (Short answer: YES!). One of my sweetest students requested a Puppy. I would have made one myself just for her. The real heart-warming thing was that she said she'd never ask for one for herself... She wanted it to give to her mother for her birthday & she knew she couldn't learn how to do it in time! SQUISH!


I've moved on to the most complex design of the book to make butterflies for my Niece 's Christmas present.
(I also used a little stash cotton to cover one of Sam's favorite, but somewhat chewed-upon rubber balls.)

Again, I made a few little stylistic changes to the pattern (ex. Butterflies are insects, ergo six legs & I wanted a girl-y butterfly… hence the bikini top.)

Yes. I know, there are no mammary glands on insects...

There is a Pink & Blue version in the works, too!


Over the past months, I've also made the February Baby Sweater (shown here in progress) & am almost done with the adult version!
Not being a wealthy knitter, I've substituted dishcloth cotton for the worsted wool for which the pattern calls. I'm pretty happy with it so far... but cotton can stretch in unattractive ways. So, only time will tell.

I've also made some little quick dishcloth cotton finger puppets:
if anyone wants me to post a pattern, it's very simple & fast if you are proficient with DPNs....

I also have figured a seamless version of a cute sleeveless shell pattern (W by Kristi Porter) from knitty.com Spring 2005.
I LOVED working with my stash of Katia Jamaica cotton!

It even looks good when I wear it. Too cold to model it now... Sigh.

As is this lovely camisole made from a yummy sock yarn (Razor Cami by Katie Marcus... it's a free pattern on her blog!) made as part of the Knit Girls KAL August 2009:
Detail of the stitch pattern:
So... I've been working... Just not documenting.

When Christmas Break comes, perhaps I can post a pattern & pictures of my Dangly Tiger made for Sam's birthday. That was some adorable fun.

One of these days... Sigh.

Friday, July 31, 2009

The Knit Nook "Beer Summit" 2009

Every knitter loves their LYS (Local Yarn Store). I am no exception.
The Knit Nook is quite the yarn haven! You should definitely make a visit if & when you find yourself in Louisville, KY.

IMG_3772

Please note fabulous tshirt design by SteigerBeat

I am rarely able to get to the Thursday S & B (Stitch & Bitch) during the school year. Yesterday was the last I'll be able to attend for a while... especially when I resume teaching after school art classes. The owners & patrons are a wonderful group of people who kindly indulge my geeky quirks & foibles... knitterly & otherwise.


I got a wild hair yesterday to celebrate the occurrence of the most wonderfully sensible-yet-ridiculous "Beer Summit" by having our own at the S & B.

IMG_3739

(Apparently, Professor Gates' choice was changed from Red Stripe to Sam Adams Light... we were working with the best info we had at the time. Both of the professor's choices were considered the best options by all us knitterly types.)
More pictures of actual knitters, knitted items, adorable babies & toddlers are posted on the Knit Nook Forum on ravelry...

Monday, July 20, 2009

The BuckyBag!... A Fulled Tribute to Fuller!

This Summer has been far more hectic than I had hoped.

I told myself I just needed a simple, mindless knit-until-you’re-done stressbuster... I swear!

This is mindless once you understand the concept... (If you have two sets of dpns so you don't have to count at all, really.)

I actually wrote down the pattern notes as I went.
I was just playing with the Celestine idea of seamlessly connected geometric shapes with a Fuller inspired set of pentagons & hexagons.

At first, I was not sure if it would felt as a sphere or a star...

Buckminster Fuller, I LUUURVE you!


The BuckyBag!... A Fulled Tribute to Fuller!

Yarn:
~2 skeins Black Cascade 22o
~3 skeins Lion Wool prints

Needles:
~2 sets size 9 dpns
(You can do it on one set, but it gets overly fiddly & a pain to count without at least 7 dpns)
~1 size 9 circular (24" or 32" is fine)

Notions:
~yarn needle
~a knowledge of basic felting (fulling, really)

Pattern for a Pentagon:

CO 17 sts each on 5 dpns (pick up 17 sts from a CO edge when needed)

Knit 5 rounds (3 black, 2 in print wool)

Begin decreases:

Each dpn, k2tog, k to last 2 sts, ssk.

Knit 2 rounds

When you have 3 sts on each dpn:

Knit 2 rounds, then sl1, k2tog, Psso.

Break yarn, use yarn needle to run yarn through loops, pull tight & tie off.

(Just like finishing a beanie hat!)

Pattern for a Hexagon:

CO 17 sts each on 6 dpns (pick up 17 sts from a CO edge when needed)

Knit 5 rounds (3 black, 2 in print wool)

Begin decreases:

Each dpn, k2tog, k to last 2 sts, ssk.

Knit 2 rounds

When you have 3 sts on each dpn:

Knit 2 rounds, then sl1, k2tog, Psso.

Break yarn, use yarn needle to run yarn through loops, pull tight & tie off.

Pattern for a Half-Hexagon:

Pick up 18 sts on pentagon edge, 17 sts on hexagon edge, 18 sts on adjoining pentagon edge

(This will be knit in flat stockinette!... Don't forget to purl back.)

K 5 rows, sl 1st st of every row, knit or purl (3 rows black, 2 rows in print wool)

Begin Decreases: (Some will be done on the purl side!)

Knit side decreases:

Sl1, K2tog, K to last 2 sts, ssk./K2tog, K to last 2 sts, ssk./K2tog, K to last 3 sts, ssk, K1.

Purl side decreases:

Sl1, P2tog, P to last 2 sts, ssp./P2tog, P to last 2 sts, ssp./P2tog, P to last 3 sts, ssp, P1

*Always have 2 rows between decrease rows*

When there are 3 sts on each dpn, work 2 more rows flat.

The RS, or Knit side should be facing you.

(Sl1, K2 tog, psso)* each dpn, 3sts total remain

Turn to WS, Sl1, K2 tog, psso to BO.


Method of Assembly:
1. Begin with a black pentagon...
2. Cast on five sides of a hexagon & pick up the last side on the cast on edge of one side of the original pentagon.
3. For the next three Hexagons, cast on four sides, pick up one side from the last hexagon & pick up one side from the abutting side of the original pentagon.
4. For the fifth hexagon, cast on three sides, pick up one side from the last hexagon, pick up one side from the abutting side of the original pentagon & pick up one side (the only available edge) of your first hexagon.
It will look a bit like this:

5. Make five pentagons, one between each set of touching hexagons by casting on three sides and picking up the last two to connect the shapes.

6. Add five half-hexagons, one between each set of touching pentagons & hexagons to make a "finished" half sphere.

7. Pick up 240 sts in black, place marker at beginning of round & knit for 6 rounds.

8. Switch to the print & knit for 8-10 rounds, or until your yarn is gone.

9. Switch back to black & knit 3 rounds

10. (K10, K2tog)* = 220 sts.

11. Knit 2 rounds

12. (K9, K2tog)* = 200 sts.

13. Knit 2 rounds

14. (K8, K2tog)* = 180 sts.

15. Knit 2 rounds

16. (K7, K2tog)* = 160 sts.

17. Knit 6 rounds

18. Knit 20 sts on one dpn, BO 20 sts. Repeat 3X for 4 handle bases.

19. Each handle:

Knit 20 rows in stockinette using dpns, slipping the 1st stitch of each row.

Sl 1, K2tog, K to last 3 sts, ssk, k1 = 18 sts.

Purl all sts

Repeat until 14 sts remain.

Knit 10 rows in stockinette.

Repeat this on all 4 handle bases.

Graft handles together using Kirchner stitch (instructions abound online).

Full your bag using your favorite method. I used my washing machine for 14 min on permanent press cycle.

It’s Felt-tastic!


I then went ape and made Sammy a soccer ball using the same ideas:

I had a brain pop to turn it into a hat... I'll actually write that up as a real pattern & post it, too.

Summer Weight Cotton Worsted Chullos!


(this is the photo from the online pattern)
Well. I saw this pattern online & fell totally in love!

http://www.ravelry.com/patterns/sources/ozyarn-archived

What a gorgeous & super quick knit! Who knew?

However, the wool chullo was VERY warm.

I’ve now used up some worsted cotton stash & scrap to make a summer weight chullo for my bad Spring & Summer hair!

Well. Yes. That hat was lovely.
However, I soon found out it was not the hat for me. Now it graces the lovely noggin’ of my friend Mary... before it got STOLEN!!!

I’ll make another for myself... and another for her.
They go quickly…

I have long since left the original pattern behind.

I'll post a version of the Fleur de Lys when I have it written up.


I also need to work up a pattern or video tutorial for 2-color i-cord. I want to share my “discovery” with the world.
I am in LOVE with the look of it!

Has anyone seen it done elsewhere?

Can anyone help me make a tutorial video & post it?

Monday, March 30, 2009

Bubbles!

Well. I am quite proud.

Earlier this month I completed a present for Sam which I've had on the needles for quite a while. It's been really something to get things finished, lately. I'm looking to summer

Sheldon, by Ruth Homrighaus is an adorable, affordable (free pattern & done with inexpensive cotton sportweight) project!

As you can see Sam loves it:
He even named it! He took one look at it & hugged it... Happily crying "Bubbles!"

I thought it was just one of those language flukes toddlers often have... But, later when the Godfatha' asked him where "Bubbles" was... HE WENT TO THE STUFFED ANIMAL SHELF!!!
As most knitting -oriented people may know, Sheldon has a bit of a cult following. The original designer, as well as other ravelry types have made other "shell" costumes for him to wear. There's even a Spiderman outfit! How cute is that?

I will have to make one, too. I can feel it.
I'm just waiting for inspiration to hit.

I will say this... I am a little concerned with what may come from teaching Sam that (knitted?) turtles can come out of/change their shells. Hmmmm....

Saturday, February 28, 2009

Birthday Mittens

I know. I'm an intermittent blogger at best.

I have no desire to document my life in knitting
...I merely wish to make a few records to share of the knitting in my life... & there's been precious little of that!

The most recent project in my busy life (teaching & a toddler doesn't allow for much time to create anything other than a living...) has been some simple mittens.

The Godfatha' has a birthday in February. I'm broke like everybody else, so I asked him if I could make anything for him.
The first request was for a pie.
Done!
(n.b. that is not burny-ness... the dark parts are chocolate that has bubbled up from the bottom. This will happen when one uses an entire bag of chips in an "I-can't-believe-it's-not-Derby-Pie"...)
Come on, there has to be something more for the man who makes sure my Sam is never gonna suffer single-mamma's-son issues.
All he wanted was mittens. So, mittens it was.

Who knew designing mittens could be tricky?
Well, it's not like I was really designing. I was merely adapting the things I had done to adapt the Cigar-Style Fingerless Gloves into mitten form.
I chose a Fair-Isle Style, because it gives a double thickness & warmth to the final mitty.
I know that twisting the yarn & balls can be fussy, but so worth it in the end.

The first one ended up a ladies medium/large, despite gauge & swatch & tracing measures.
(Some lady in my life is going to end up with a present of mittens soon...)
The first attempt is on the top of the photo.
I measured some more & ended up with the mittens you see in the bottom of the photo.
I like the darker tone to them... much more suited to the Godfatha' anyway.

Here is a potentially buggy free pattern transposed from my notes:

Birthday Mittens by Ruth H. Bennett

Yarn:
MC: 1 skein Black Cascade 220 (I would have preferred another ball of LP, sigh.)
CC: 1 skein Brown Sheep Lamb's Pride worsted, Prairie Fire (a heathered red)
(Your favorite worsted weight yarn would be a suitable substitution...)

Needles & Notions:
Size 5(us) DPNs
Yarn needle

Gauge:
6 sts & 7 rows = 1”

Cuff:
CO 44 sts.
Work in the round in 2x2 rib for 28 rounds for cuff.

Gusset:
1: K one round.
2: K1 in MC, Switch to CC & M1, (carry & "twist in" black as you go...)K 20, K2 in MC, K20 in CC, M1 in CC, K1 in MC=46sts.
3: K one round in MC.
4: K1 in MC, Switch to CC & M1, (carry & "twist in" black as you go...)K 21, K2 in MC, K21 in CC, M1 in CC, K1 in MC=48sts.
5: K one round in MC.
6: K1 in MC, M1, K 22 alternating MC & CC, K2 in MC, K22 alternating MC & CC, M1, K1 in MC=50sts.
7: K1 in MC, K23 alternating MC & CC (the opposite of the last row), K2 in MC, K23 alternating MC & CC.
8: K1 in MC, M1, K 23 alternating MC & CC, K2 in MC, K23 alternating MC & CC, M1, K1 in MC=52sts.
9: K1 in MC, K24 alternating CC & MC, K2 in MC, K24 alternating CC & MC.
10: K1 in MC, M1, K 24 alternating MC & CC, K2 in MC, K24 alternating MC & CC, M1, K1 in MC=54sts.
11: K1 in MC, K25 alternating CC & MC , K2 in MC, K25 alternating CC & MC, K1 in MC.
12: K1 in MC, M1, K 25 alternating MC & CC, K2 in MC, K25 alternating MC & CC, M1, K1 in MC=56sts.
13: K one round in MC
14: K1 in MC, Switch to CC (carry & "twist in" black as you go...)K 26, K2 in MC, K26 in CC, K1 in MC.
15: K one round in MC
16: K1 in MC, Switch to CC & M1, (carry & "twist in" black as you go...)K 26, K2 in MC, K26 in CC, M1 in CC, K1 in MC=58sts.
17: K one round in MC
18: K1 in MC, K27 alternating CC & MC , K2 in MC, K27 alternating CC & MC, K1 in MC.
19: K1 in MC, K27 alternating MC & CC (the opposite of the last row), K2 in MC, K27 alternating MC & CC, K1 MC.
20: K1 in MC, M1, K 27 alternating MC & CC, K2 in MC, K27 alternating MC & CC, M1, K1 in MC=60sts.
21: K1 in MC, K28 alternating CC & MC , K2 in MC, K27 alternating CC & MC, K1 in MC.
22: K1 in MC, K28 alternating MC & CC (the opposite of the last row), K2 in MC, K28 alternating MC & CC, K1 MC.
23: K1 in MC, K28 alternating MC & CC (the opposite of the last row), K2 in MC, K28 alternating MC & CC, K1 MC.
24: K1 in MC, M1, K 28 alternating MC & CC, K2 in MC, K28 alternating MC & CC, M1, K1 in MC=62sts.
25: K one round in MC
26: K1 in MC, Switch to CC (carry & "twist in" black as you go...)K 29, K2 in MC, K29 in CC, K1 in MC.

(This is where we take off the 12 sts for the thumb!)
27: K one round in MC, stop 6 sts before end, place on holder or spare DPN, put 1st 6 sts of next round on same holder.
Pull tight when starting next round.
28: K1 in MC, Switch to CC & M1, (carry & "twist in" black as you go...)K 23, K2 in MC, K23 in CC, M1 in CC, K1 in MC=52sts.
29: K one round in MC
30: K1 in MC, M1, K 24 alternating MC & CC, K2 in MC, K24 alternating MC & CC, M1, K1 in MC=54sts.
31: K1 in MC, K25 alternating MC & CC (the opposite of the last row), K2 in MC, K25 alternating MC & CC, K1 MC.
32: K1 in MC, M1, K 25 alternating MC & CC, K2 in MC, K25 alternating MC & CC, M1, K1 in MC=56sts.
33-36: K1 in MC, K26 alternating MC & CC (the opposite of the last row), K2 in MC, K26 alternating MC & CC, K1 MC.
37: K one round in MC.
38: K1 in MC, Switch to CC (carry & "twist in" black as you go...)K 26, K2 in MC, K26 in CC, K1 in MC.
39: K one round in MC.
40: K1 in MC, Switch to CC (carry & "twist in" black as you go...)K 26, K2 in MC, K26 in CC, K1 in MC.
41: K one round in MC.
42-48: K1 in MC, K26 alternating MC & CC (the opposite of the last row), K2 in MC, K26 alternating MC & CC, K1 MC.
49: K one round in MC.
50: K1 in MC, Switch to CC (carry & "twist in" black as you go...)K 26, K2 in MC, K26 in CC, K1 in MC.
51: K one round in MC.
52: K1 in MC, Switch to CC (carry & "twist in" black as you go...)K 26, K2 in MC, K26 in CC, K1 in MC.

Begin “finger cap” Decreases:

53: Break CC yarn. K one round in MC.
54-5: Knit MC. (This is where you could add more rounds if a longer finger length is needed.)
56: (K5, K2tog)* = 48 sts.
57: K3, PSSO, (K4, PSSO)* 5 times, K4, PSSO using 1st st of next row =40sts.
58: (K3, K2tog)* =32 sts.
59: K1, PSSO, (K2, PSSO)* 5 times, K2, PSSO using 1st st of next row =24sts.
60: (K1, K2tog)* =16 sts.
61: (K2tog)* =8sts.
Break Yarn. Sew end through 8 loops & pull snug.
Weave in loose ends.

Thumb:

On 3 DPNs, Place 3 sts, 6sts, 3 sts.
1: Using MC, Knit one round, Pick up 2 sts on last DPN using loose yarn edge from that side of the thumb hole = 14 sts. (**Leave a long tail when beginning row.)
2: Pick up 2 sts from the loose yarn edge from that side of the thumb hole. Knit rest of round. Sts should now be 16= 5/6/5, on 3 DPNs.
3-14: Knit.
15: (K2, K2tog)* =12sts.
16: Knit.
17: (K1, K2tog)* =8sts.
Break Yarn. Sew end through 8 loops & pull snug.
Weave in loose ends.

Finishing:
Use long tail to sew gap from thumb base together snugly. I used a blanket stitch to give it a neat finish.
Weave in all remaining loose ends.

Tuesday, February 10, 2009

Andean Hats

I am taking a moment from my sick day at home to (finally) post about some knitting.
Concentrating on yummy color work sure does beat focusing on stomach cramps & even nastier symptoms of a stomach flu...

Here is a vision of knitting bliss: A basket full of neatly balled wool on the big red knitting chair... Sigh.

I usually NEVER fall for kits, but this kit from Knit Picks was too fabulous to resist!
These are the perfect gifts for my Colorado nephews…

Here is the one for the younger neph:


Here is the one for the older neph:

Well, it’s Llama Chullo II: Electric Boogaloo! The color work looks complex, but is really rather straightforward... In fact, this is an ideal project to combat Seasonal Affective Depression.

This time I’m added 16 sts to the circumference so it will fit my oldest Neph’s giant cranium.

I can’t wait to start changing the charts to have other motifs aside from the LLLLLLLLAMAS!

After this adaptation, I think I’m going to adapt the pattern to make it for old Atari system lovers… Can you say “Space Invaders Chullo”? I hope I won't run into copyright problems...

Pattern Notes:

To achieve gauge, I had to use size 4 needles. a 16' circular was fine for the body of the hat (especially on the 24" hat), but I had to switch to dpns for the crown decreases.

I ended up adding 32 sts to the crown cast on=192 sts.
My reasoning is this: the small pattern bands are based on an (8 to) 16 repeat, but the wave pattern I wanted to use instead of the alpaca motif is based on 10s. I just decreased 2 on the solid color rows before the wave motif & increased 2 again for the remaining small bands & crown decreases.
Yes, this does give you 12 instead of 10 decrease units, but the transition to 3 st. i-cord is much smoother.

So… voila! a 24” crown & an men’s large sizing!

note: If you use the large alpaca motif for your pattern (instead of the wave/ripples), you do not need to change any counts while knitting the crown.