Wednesday, December 31, 2008

The Seamless Dangly...


The Brown Monkey
(a.k.a. the seamless mr. dangly)
by Ruth H. Bennett

My mother is a shameless addict. Yep. It’s true. Thankfully, she has a good sense of humor about it all. Alcohol? Nope. Prescription Pain Pills? Nope.
She’s a junkie for high quality dark chocolate. She can’t start her day or her body in the morning without a small piece of it.
So, my sister Anne has euphemized her addiction as “the visit from the Brown Monkey”... Yes. Brown Monkey... as in “monkey on her back”.
This reference to the “Brown Monkey” pops up everywhere in our daily conversations... it’s a bona fide family inside joke at this point. I was inspired to make an actual monkey to be hidden around & pop up for a visit whenever my sister wanted or needed a laugh.
He also hangs quite nicely over your shoulders by his long arms... on your back!
(Come to think of it... I probably should have stuffed him with old Dove “Promise” wrappers instead of Fiber-fil...)

I have made several monkeys modeled after this fine pattern ( Mr. Dangly) I found on ravelry. I think his styling is beyond adorable.
Yep. I took a look at the pattern & said, these Brits sure are great knitters, but DAMN they love to knit everything in pieces & seam it all. I have a compulsion to go seamless when I am able, so I took the basic dimensions of the Dangly & worked it over as seamless pieces that are only sewn together at their joints.

Here is the address for the inspiration: http://electricbiscuitonline.blogspot.com/2005/06/clone-mr-dangly.html

Gentle Reader,

Please remember general free pattern etiquette.


Which means:
This is a free pattern & you get what you pay for. Management is not responsible for honest typos & missed counts. Please do not sell or pass this pattern off for your own.
All of my patterns are meant for personal, educational use, not for profit!
If you wish to use it for a class, please ask first... I will most likely say YES!

If you wish to share it, please link directly to my blog or my Ravelry page.
This is not copyrighted, but misuse of it will generally be found out, mocked by other knitters & punished with bad knitting karma.

Thank You.
-Ru.

The Pattern for THE BROWN MONKEY:

Yarn: Lily Sugar & Cream Solids Cotton
(just use any worsted weight yarn you like, really...)
CC: 1 skein Jute (less than 120 yds)
MC: 2 skeins Warm Brown (280 yds)

Needles: US 5 / 3.75 mm DPNs

Gauge: Not important, but 4.5 sts & 6 rows = 1”
Just keep the gauge kinda tight to hold in the stuffing

Supplies:
~Size F crochet hook
~Yarn Needle
~Poly Fiber-Fil
~Scissors
~12” of Saran Wrap
~Safety Eyes or buttons (I used bare wooden ones) in your chosen color
Optional: Little bean bags (you can use old nylons & plastic pellets!) for “feet & hands”

Head:

Row 1: Long Tail CO 6 sts over 3 DPNs using CC (Jute)
Row 2: Knit
Row 3: (M1, K1, M1, K1)* = 12 sts
Row 4: Knit
Row 5: (K1, M1, K2, M1, K1)* = 18 sts
Row 6: Knit
Row 7: (K1, M1, K4, M1, K1)* = 24 sts
Row 8: Knit
Row 9: (K1, M1, K2, M1, K2, M1, K2, M1, K1)* = 36 sts
Row 10: Knit
Row 11: (K1, M1, K4, M1, K2, M1, K4, M1, K1)* = 48 sts
Row 12: Knit
Row 13: (K1, M1, K6, M1, K2, M1, K6, M1, K1)* = 60 sts
Rows 14-19: Knit
Row 20: (K1, K2tog, K4, K2tog, K1)* =48 sts
Rows 21-24: Knit
Break Yarn, Switch to MC (Warm Brown)
Rows 25-48: Knit

(if you are using safety eyes, place them now before you start closure...)

Begin Decreases:
Row 49: (K4, K2tog)* = 40 sts
Row 50: Knit
Row 51: (K3, K2tog)* = 32 sts
Row 52: Knit
Row 53: (K2, K2tog)* = 24 sts
Row 54: Knit
(this is the time to sew the opening hole shut & stuff the head with fiber-fil...)
Row 55: (K1, K2tog)* = 16 sts
Row 56: Knit
Row 57: (K2tog)* = 8 sts
Break yarn, run tail through the 8 loops, pull tight & tie off as if finishing a beanie hat.

Body:

Row 1: Long Tail CO 12 sts over 4 DPNs using MC (Warm Brown)
Rows 2-5: Knit
Row 6: (K1, M1, K4, M1, K1)* = 16 sts
Rows 7-10: Knit
Row 11: (K1, M1, K6, M1, K1)* = 20 sts
Rows 12-15: Knit
Row 16: (K1, M1, K8, M1, K1)* = 24 sts
Rows 17-20: Knit
Row 21: (K1, M1, K10, M1, K1)* = 28 sts
Rows 22-25: Knit
Row 26: (K1, M1, K12, M1, K1)* = 32 sts
Rows 27-30: Knit
Row 31: (K1, M1, K14, M1, K1)* = 36 sts
Rows 32-35: Knit
Row 36: (K1, M1, K16, M1, K1)* = 40 sts
Rows 37-40: Knit
Row 41: (K1, M1, K18, M1, K1)* = 44 sts
Rows 42-45: Knit
Row 46: (K1, M1, K20, M1, K1)* = 48 sts
Rows 47-50: Knit
Row 51: (K1, M1, K22, M1, K1)* = 52 sts
Rows 52-55: Knit
Row 56: (K1, M1, K24, M1, K1)* = 56 sts
Rows 57-60: Knit
Row 61: (K1, M1, K26, M1, K1)* = 60 sts
Rows 62-85: Knit

Begin Decreases:
Row 86: (K4, K2tog)* = 50 sts
Row 87: Knit
Row 88: (K3, K2tog)* = 40 sts
Row 89: Knit
Row 90: (K2, K2tog)* = 30 sts
Row 91: Knit
(this is the time to sew the opening hole shut & stuff the head with fiber-fil...)
Row 92: (K1, K2tog)* = 20 sts
Row 93: Knit
Row 94: (K2tog)* = 10 sts
Break yarn, run tail through the 10 loops, pull tight & tie off as if finishing a beanie hat.

Arms (make 2):

Be sure to keep stuffing as you go... These thin limbs are hard to stuff evenly after the fact.)
Row 1: Long Tail CO 12 sts over 3 DPNs using MC (Warm Brown)
Rows 2-5: Knit
Row 6: (K1, M1, K4, M1, K1)* = 16 sts
Rows 7-36: Knit
Row 37: (K1, M1, K6, M1, K1)* = 20 sts
Rows 38-57: Knit
Row 58: (K1, M1, K1)* = 30 sts
Rows 59-60: Knit
Break Yarn, Switch to CC (Jute)
Rows 61-70: Knit

Begin Decreases:
Row 71: (K3, K2tog)* = 24 sts
Row 72: Knit
Row 73: (K2, K2tog)* = 18 sts
Row 74: Knit
Row 75: (K1, K2tog)* = 12 sts
Row 76: Knit
Row 77: (K2tog)* = 6 sts
Finish stuffing or place bean bags in the “hands” (I hope you remembered to stuff as you go)
Break yarn, run tail through the 6 loops, pull tight & tie off as if finishing a beanie hat.

Legs (make 2):

Be sure to keep stuffing as you go... These thin limbs are hard to stuff evenly after the fact.)
Row 1: Long Tail CO 12 sts over 3 DPNs using MC (Warm Brown)
Rows 2-5: Knit
Row 6: (K1, M1, K4, M1, K1)* = 16 sts
Rows 7-16: Knit
Row 17: (K1, M1, K6, M1, K1)* = 20 sts
Rows 18-37: Knit
Row 38: (K1, M1, K1)* = 30 sts
Rows 39-40: Knit
Break Yarn, Switch to CC (Jute)
Rows 41-50: Knit

Begin Decreases:
Row 51: (K3, K2tog)* = 24 sts
Row 52: Knit
Row 53: (K2, K2tog)* = 18 sts
Row 54: Knit
Row 55: (K1, K2tog)* = 12 sts
Row 56: Knit
Row 57: (K2tog)* = 6 sts
Finish stuffing or place bean bags in the “footpads” (I hope you remembered to stuff as you go)
Break yarn, run tail through the 6 loops, pull tight & tie off as if finishing a beanie hat.

Tail:

Long Tail CO 12 sts, Knit in the round for 10 “.
Use crochet hook to pull Saran Wrap through tube to stuff & trim to measure.
To close: (K2tog)* = 6 sts
Pull yarn trough loops to close.

Ears (make 2):

Row 1: Longtail CO 8 sts
Row 2: Sl1 Purl
Row 3: Sl1, M1, K6, M1, K1 = 10 sts
Row 4: Sl1, Purl
Row 5: Sl1, M1, K8, M1, K1 = 12 sts
Row 6: Sl1, Purl
Row 7: Sl1, Knit
Row 8: Sl1, Purl
Row 9: Sl1, Knit
Row 10: Sl1, Purl
Row 11: Sl1, Knit
Row 12: Sl1, Purl
Row 13: Sl1, K10, P1
Row 14: Sl1 K wise, K10, P1
Break yarn & switch to CC (Jute)
Row 15: Sl1, Knit
Row 16: Sl1, Purl
Row 17: Sl1, Knit
Row 18: Sl1, Purl
Row 19: Sl1, Knit
Row 20: Sl1, Purl
Row 21: Sl1, Knit
Row 22: Sl1, Purl
Row 23: Sl1, K2tog, K6, PSSO, K1 = 10 sts
Row 24: Sl1, Purl
Row 25: Sl1, K2tog, K4, PSSO, K1 = 8 sts
Row 26: Sl1, Purl
Row 27: BO in Knit

Weave in ends. Fold ear in half along center line of purl sts, knit side out. Align slipped stitch edges & join the 2 sides with a line of single crochet using MC (Warm Brown).
(If you are uncomfortable with even single crochet, you can use a whip stitch or even a back stitch to join the two sides of the ear, but it won't have as finished a look.)
Use the "tail" of the crochet to whip stitch the ear to the side of the head using purl bump guides, CC color facing front as shown.

Finishing:
I sewed this guy up as I went along, but you can please yourself...
I sewed the neck closed & sewed on the head near the bottom/rear...
The arms were sewed on just below the neck, as shown. The legs were sewed on along the bottom edges of the body , aligned with the increase “seams”. I sewed the ears on the sides of the head, I just eyed them in & counted knit stitches on the head to make them as even as I could.
You can now sew on buttons for eyes (if you did not use safety eyes...)or embroider nostrils or any other embellishment you like!
I gave the Brown Monkey six strands of crochet chain “hair” at the crown of his head for added character, but the customize-able possibilities are endless.

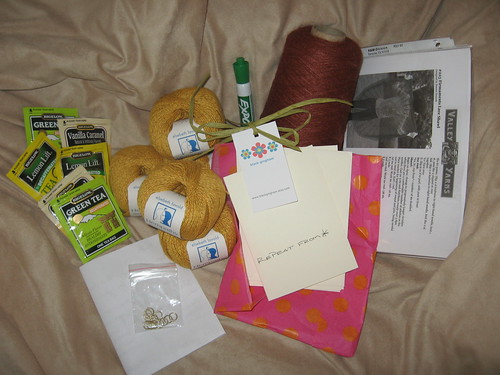
Oh... just because I haven't posted any Sam knitting photos recently...
Please note the "Brown Monkey" shoes!

Monday, December 29, 2008

All Hail Prince Horsie-Pony!

My fabulous friend Terry’s daughter named a stray pet this, the BEST NAME EVER:

“Prince Horsie-Pony”.

I have used this amazing name as my inspiration for a very girlie stuffie modeled after this fine pattern ( Mr. Dangly ) I found on ravelry.
I took a look at the pattern & said, "Those Brits sure are great knitters, but DAMN they love to knit everything in pieces & seam it all!" I have an American compulsion to go seamless when I am able, so I took the basic dimensions of the Dangly & worked it over as seamless pieces that are only sewn together at their joints. I made many alterations for character & increased horsie-ness, but it is clear this stuffie is inspired by the noble "House of Dangly"
So... This prince is seamless… just like the Brown Monkey & the Ballerina Dangle-ina (Seen here in a group shot).


I will post the seamless limbs & the elefante style ears for my “seamless” dangly in my next post. I promise.

Gentle Reader,

Please remember general free pattern etiquette.


Which means:
This is a free pattern & you get what you pay for. Management is not responsible for honest typos & missed counts.

Please do not sell or pass this pattern off for your own.
All of my patterns are meant for personal, educational use, not for profit!
If you wish to use it for a class, please ask first... I will most likely say YES!
If you wish to share it, please link directly to this blog or my Ravelry page.
This is not copyrighted, but misuse of it will generally be found out, mocked by other knitters & punished with bad knitting karma.


Thank You.

-Ru.

The Pattern for the PRINCE HORSIE-PONY:

Yarn: Lily Sugar & Cream Ombres & Solids Cotton
(just use any worsted weight yarn you like, really...)
CC: 1 skein Ecru (less than 120 yds)
MC: 2 skeins Jewel (190 yds)

Needles: US 5 / 3.75 mm DPN

Gauge: Not important, but 4.5 sts & 6 rows = 1”

Supplies:
~Size F crochet hook
~Yarn Needle
~Poly Fiber-Fil
~Scissors
~Safety Eyes or buttons in your chosen color
Optional: Little bean bags (you can use old nylons & plastic pellets!) for “hooves”

Head:

Row 1: Long Tail CO 6 sts over 3 DPNs using CC (ecru)
Row 2: Knit
Row 3: (M1, K1, M1, K1)* = 12 sts
Row 4: Knit
Row 5: (K1, M1, K2, M1, K1)* = 18 sts
Row 6: Knit
Row 7: (K1, M1, K4, M1, K1)* = 24 sts
Row 8: Knit
Row 9: (K1, M1, K2, M1, K2, M1, K2, M1, K1)* = 36 sts
Row 10: Knit
Row 11: (K1, M1, K4, M1, K2, M1, K4, M1, K1)* = 48 sts
Row 12: Knit
Row 13: (K1, M1, K6, M1, K2, M1, K6, M1, K1)* = 60 sts
Rows 14-19: Knit
Row 20: (K1, K2tog, K4, K2tog, K1)* =48 sts
Rows 21-24: Knit
Break Yarn, Switch to MC (Jewel)
Rows 25-48: Knit

(if you are using safety eyes, place them now before you start closure...)
Begin Decreases:
Row 49: (K4, K2tog)* = 40 sts
Row 50: Knit
Row 51: (K3, K2tog)* = 32 sts
Row 52: Knit
Row 53: (K2, K2tog)* = 24 sts
Row 54: Knit
(this is the time to sew the opening hole shut & stuff the head with fiber-fil...)
Row 55: (K1, K2tog)* = 16 sts
Row 56: Knit
Row 57: (K2tog)* = 8 sts
Break yarn, run tail through the 8 loops, pull tight & tie off as if finishing a beanie hat.

Body:

Row 1: Long Tail CO 12 sts over 4 DPNs using MC (Jewel)
Rows 2-5: Knit
Row 6: (K1, M1, K4, M1, K1)* = 16 sts
Rows 7-10: Knit
Row 11: (K1, M1, K6, M1, K1)* = 20 sts
Rows 12-15: Knit
Row 16: (K1, M1, K8, M1, K1)* = 24 sts
Rows 17-20: Knit
Row 21: (K1, M1, K10, M1, K1)* = 28 sts
Rows 22-25: Knit
Row 26: (K1, M1, K12, M1, K1)* = 32 sts
Rows 27-30: Knit
Row 31: (K1, M1, K14, M1, K1)* = 36 sts
Rows 32-35: Knit
Row 36: (K1, M1, K16, M1, K1)* = 40 sts
Rows 37-40: Knit
Row 41: (K1, M1, K18, M1, K1)* = 44 sts
Rows 42-45: Knit
Row 46: (K1, M1, K20, M1, K1)* = 48 sts
Rows 47-50: Knit
Row 51: (K1, M1, K22, M1, K1)* = 52 sts
Rows 52-55: Knit
Row 56: (K1, M1, K24, M1, K1)* = 56 sts
Rows 57-60: Knit
Row 61: (K1, M1, K26, M1, K1)* = 60 sts
Rows 62-85: Knit

Begin Decreases:
Row 86: (K4, K2tog)* = 50 sts
Row 87: Knit
Row 88: (K3, K2tog)* = 40 sts
Row 89: Knit
Row 90: (K2, K2tog)* = 30 sts
Row 91: Knit
(this is the time to sew the opening hole shut & stuff the head with fiber-fil...)
Row 92: (K1, K2tog)* = 20 sts
Row 93: Knit
Row 94: (K2tog)* = 10 sts
Break yarn, run tail through the 10 loops, pull tight & tie off as if finishing a beanie hat.

Arms & Legs (make 4):

(Be sure to keep stuffing as you go... These thin limbs are hard to stuff even ly after the fact.)
Row 1: Long Tail CO 12 sts over 3 DPNs using MC (Jewel)
Rows 2-5: Knit
Row 6: (K1, M1, K4, M1, K1)* = 16 sts
Rows 7-46: Knit
Row 47: (K1, M1, K6, M1, K1)* = 20 sts
Rows 48-51: Knit
Row 52: (K1, M1, K1)* = 30 sts
Rows 53-54: Knit
Break Yarn, Switch to CC (Ecru)
Rows 55-64: Knit

Begin Decreases:
Row 65: (K3, K2tog)* = 24 sts
Row 66: Knit
Row 51: (K2, K2tog)* = 18 sts
Row 52: Knit
Row 53: (K1, K2tog)* = 12 sts
Row 54: Knit
Row 57: (K2tog)* = 6 sts
Finish stuffing or place bean bags in the “hooves” (I hope you remembered to stuff as you go)
Break yarn, run tail through the 6 loops, pull tight & tie off as if finishing a beanie hat.
EARS:

Row 1: Using MC yarn, Long Tail CO 4sts
Row 2: Sl1, Purl
Row 3: Sl1, Knit
Row 4: Sl1. Purl
Row 5: Sl1, M1, K2, M1, K1= 6 sts
Row 6: Sl1, Purl
Row 7: Sl1, M1, K4, M1, K1= 8 sts
Row 8: Sl1, Purl
Row 9: Sl1, M1, K6, M1, K1= 10 sts
Row 10: Sl1, Purl
Row 11: Sl1, M1, K8, M1, K1= 12 sts
Row 12: Sl1, Purl
Row 13: Sl1, Knit
Row 14: Sl1, Purl
Row 15: Sl1, K10, P1
Row 16: Sl1, K10, P1
~Break yarn, switch to CC (Ecru)
Row 17: Sl1, Knit
Row 18: Sl1, Purl
Row 19: Sl1, Knit
Row 20: Sl1, Purl
Row 21: Sl1, K2Tog, K6, PSSO, K1 = 10 sts
Row 22: Sl1, Purl
Row 23: Sl1, K2Tog, K4, PSSO, K1 = 8 sts
Row 24: Sl1, Purl
Row 25: Sl1, K2Tog, K2, PSSO, K1 = 6 sts
Row 26: Sl1, Purl
Row 21: Sl1, K2Tog, , PSSO, K1 = 4 sts
Row 22: Sl1, Purl
Row 23: Sl1, Knit
Row 24: BO in Purl

~Fold at Middle RS out
~Single crochet together using slipped stitches as guide with MC (Jewel). Leave long tail for finishing (tail will sew on ears to purl bump guides, CC color facing front as shown.)

Finishing:
I sewed this guy up as I went along, but you can please yourself...

I sewed the neck closed & sewed on the head near the bottom/rear...
The arms were sewed on just below the neck, as shown.
The legs were sewed on along the bottom edges of the body , aligned with the increase “seams”.
I sewed the ears on the top of the head, I just eyed them in & counted knit stitches on the head to make them as even as I could.
You can now sew on buttons for eyes or embroider nostrils or any other embellishment you like!

Tail:
I made a 4”tassel out of the CC over a piece of cardboard & sewed it on...

Mane:
I cut about 60 3 “ pieces of the CC yarn & attached them onto the head using an over hand hitch stitch (as if you were adding fringe onto a scarf) with the crochet hook through the “vees” of the knit stitches.
You can make the mane as fringy or as full as you want.

Saturday, December 13, 2008

A Pig of Fortune!


Here is Sam’s Christmas Stuffie 2008!

It is truly seamless except for the ears, lip & tail!

I made him on dpns with extra yarn I had remaining from his Boob-a-hedron… so this little piggy really did use less than half of a skein of the light pink.

Sigh. Why can’t we all make art for a living & still have insurance?

Gentle Reader,
Please remember general free pattern etiquette.

Which means:
This is a free pattern & you get what you pay for.
Management is not responsible for honest typos & missed counts.

Please do not sell or pass this pattern off for your own.
All of my patterns are meant for personal, educational use, not for profit!
If you wish to use it for a class, please ask first... I will most likely say YES!
If you wish to share it, please link directly to this blog or my Ravelry page.

This is not copyrighted, but misuse of it will generally be found out, mocked by other knitters & punished with bad knitting karma.

Thank You.
-Ru.

The Pattern for the PIG

Yarn: Caron Simply Soft in pink, magenta & black
(Negligible stash-y amounts of magenta & black, about 175 yds of pink, or main color)

Needles: US 5 / 3.75 mm DPN

Gauge: Not important, but 4.5 sts & 6 rows = 1”

Supplies:
~Size F crochet hook
~Yarn Needle
~Poly Fiber-Fil
~Scissors


HEAD & BODY:
Row 1: Using MC yarn, Long Tail CO 8sts
Row 2: Sl1, Purl
Row 3: Sl1, M1, K6,M1, K1=10 sts
Row 4: Sl1, Purl
Row 5: Sl1, M1, K8, M1, K1=12 sts
Row 6: Sl1, Purl
Row 7: Sl1, Knit (at this time, work the intarsia for the nostrils: Sl1, K2 pink, K2 black, K2 pink, K2 black,K3 pink)
Row 8: Sl1, Purl (Sl1, P1 pink, P3 black, P2 pink, P3 black, P2 pink)
Row 9: Sl1, Knit (Sl1, K1 pink, K3 black, K2 pink, K3 black, K2 pink)
Row 10: Sl1, Purl (Sl1, P1 pink, P3 black, P2 pink, P3 black, P2 pink)
Row 11: Sl1, Knit (Sl1, K2 pink, K2 black, K2 pink, K2 black,K3 pink Break black yarn & weave in ends later.)
Row 13: Sl1, Purl
Row 14: Sl1, K2tog, K6, PSSO, K1=10 sts
Row 15: Sl1, Purl
Row 16: Sl1, K2tog, K4, PSSO, K1=8 sts
Row 17: Sl1, Purl
Row 18: Sl1, K7

While keeping the live sts on one dpn, Pick up 22 sts in slipped edge stitches for a total of 28 sts.
Row 19: Place marker at the beginning of row & knit 8 rows


Muzzle Increases:

Row 26: Knit to last 4 sts , Purl last 4 sts (this is the row of sts you'll use to sew on lip!)
Row 27: Purl 4sts, K to end of round
Row 28: Knit
Row 29: K1, M1, (K2, M1)*, K1= 44 sts
Row 30: Knit
Row 31: K9, M1, K2, M1, K3, (M1, K1, M1, K2)*six times, K1, M1, K2, M1, K9= 60 sts
Row 32: Knit
Row 33: K10, M1, K2, M1, K7, (M1, K2, M1, K3)*five times, K4, M1, K2, M1, K10= 74 sts
Row 34: Knit
Row 35: K11, M1, K2, M1, K23, M1, K2, M1, K23, M1, K2, M1, K11= 80 sts
Row 36: Knit
Row 37: K12, M1, K2, M1, K50, M1, K2, M1, K12= 84 sts
Row 38-40: Knit
Row 41: K12, PSSO, K2, K2Tog, K to 18 sts before marker, PSSO, K2, K2Tog, K12= 80 sts
Row 42: Knit (I placed some Purl stitches on top of his head where I wanted guides to sew on ears at this point, but please yourself...)
Row 43: K11, PSSO, K2, K2Tog, K to 17 sts before marker, PSSO, K2, K2Tog, K11= 76 sts
Row 44: Knit
Row 45: K10, PSSO, K2, K2Tog, K to 16 sts before marker, PSSO, K2, K2Tog, K10= 72 sts
Row 46-48: Knit
Row 49: K4 with MC, K8 with waste yarn (Just like placing an "afterthought thumb in a mitten!), Knit to 12 sts before marker, K8 with waste yarn, K4 with MC.
Row 50-57: Knit
Row 58: K4 with MC, K8 with waste yarn, Knit to 12 sts before marker, K8 with waste yarn, K4 with MC.
Row 59-61: Knit
Row 62: (K7, K2Tog)* = 64 sts
Row 63: Knit
Row 64: (K6, K2Tog)* = 56 sts
Row 65: Knit
Row 66: (K5, K2Tog)* = 48 sts
Row 67: Knit
Row 68: (K4, K2Tog)* = 40 sts
Row 69: Knit
Row 70: (K3, K2Tog)* = 32 sts
Row 71: Knit (I stuffed the body at this point...)
Row 72: (K2, K2Tog)* = 24 sts
Row 73: Knit
Row 74: (K1, K2Tog)* = 16 sts
Row 75: Knit
Row 76: (K2Tog)* = 8sts
~Break yarn & run through loops with a yarn needle, pull tight, stitch closed & bury end.


TAIL:
Row 1: Using MC, Long Tail CO 10.
Row 2: Purl
Row 3: Sl1, (M1, K1)* to end.
Row 4: Purl
Row 5: Sl1, (M1, K1)* to end.
Row 6 BO in Purl
~Use cast on or Bound off tail to sew onto body. I sewed mine onto the 8 st closure of body...)

LIP:
Row 1: Using MC yarn, Long Tail CO 8sts
Row 2: Sl1, Purl
Row 3: Sl1, M1, K6,M1, K1=10 sts
Row 4: Sl1, Purl
Row 5: Sl1, M1, K8, M1, K1=12 sts
Row 6: Sl1, Purl
Row 7: Sl1, K10, P1
Row 8: Sl1, K10, P1
Break yarn, switch to CC (magenta)
Row 9: Sl1, Knit
Row 10: Sl1, Purl
Row 11: Sl1, K2Tog, K6, PSSO, K1 =10 sts
Row 12: Sl1, Purl
Row 13: Sl1, K2Tog, K4, PSSO, K1 =8 sts
Row 14: Sl1, Purl
Row 15: BO in Knit

~Fold at Middle RS out
~Single crochet together using slipped stitches as guide using MC yarn (pink). Leave long tail for finishing (tail will sew on lip using purl bump sts as a guide.)

EARS:

Row 1: Using MC yarn, Long Tail CO 4sts
Row 2: Sl1, Purl
Row 3: Sl1, Knit
Row 4: Sl1. Purl
Row 5: Sl1, M1, K2, M1, K1= 6 sts
Row 6: Sl1, Purl
Row 7: Sl1, M1, K4, M1, K1= 8 sts
Row 8: Sl1, Purl
Row 9: Sl1, M1, K6, M1, K1= 10 sts
Row 10: Sl1, Purl
Row 11: Sl1, M1, K8, M1, K1= 12 sts
Row 12: Sl1, Purl
Row 13: Sl1, Knit
Row 14: Sl1, Purl
Row 15: Sl1, K10, P1
Row 16: Sl1, K10, P1
~Break yarn, switch to CC (magenta)
Row 17: Sl1, Knit
Row 18: Sl1, Purl
Row 19: Sl1, Knit
Row 20: Sl1, Purl
Row 21: Sl1, K2Tog, K6, PSSO, K1 = 10 sts
Row 22: Sl1, Purl
Row 23: Sl1, K2Tog, K4, PSSO, K1 = 8 sts
Row 24: Sl1, Purl
Row 25: Sl1, K2Tog, K2, PSSO, K1 = 6 sts
Row 26: Sl1, Purl
Row 21: Sl1, K2Tog, , PSSO, K1 = 4 sts
Row 22: Sl1, Purl
Row 23: Sl1, Knit
Row 24: BO in Purl

~Fold at Middle RS out
~Single crochet together using slipped stitches as guide with MC (pink). Leave long tail for finishing (tail will sew on ears to purl bump guides, CC color facing front as shown.)

LEGS:

~Work legs one at a time as you would an afterthought thumb to a mitten. Leave a long tail to close up the inevitable gaps which happen at the "corners" of the pick up.

~Carefully remove waste yarn & Place 4 sts each on 4 dpns. =16 sts
Row 1: Pick up 1 sts on body on each dpn to tighten =20 sts
Row 2-9: knit in the round
Row 10: Break MC yarn & switch to black, Knit 1 round
~Divide sts 10/10 to create split hoof

First Half of Hoof:
Row 1: K10, CO6, divide over 3 dpns (5/6/5)
Row 2: K 1 round
Row 3: (K2, K2Tog)* = 12 sts
Row 4: K1 round
Row 5: (K1, K2Tog)* = 8 sts
Break yarn & pull end through loop to close, pull tight, tie off & bury end

Second Half of Hoof:
Row 1: Leave a long tail, K10, CO6, divide over 3 dpns (5/6/5)
Row 2: K 1 round
Row 3: (K2, K2Tog)* = 12 sts
Row 4: K1 round
Row 5: (K1, K2Tog)* = 8 sts
Break yarn & pull end through loop to close, pull tight, tie off & bury end

~ Stuff Leg & use tail to stitch Co edges together to create cloven hoofies!


Sunday, December 7, 2008

Tig-Cadio!

Sooo... I had a brain pop to make a tiger version of my Lafcadio back in August!

I’m thinking a sort of Bengal tiger coloring:

A muzzle in white which then switches to orange & black stripes… Ears in B&W… Body that begins in a belly in white, then switches to the tiger stripes… Feet that are white pawed with striped legs & a stripy i-cord tail.

I am jazzed!
I had the acrylic stuff here as stash (Caron Simply Soft), so how could I resist? I’m WEAK, I tell ‘ya!

Well, I finally got it done back in November & am only now getting it together to have some instructions (mostly because there is a nice lady in Australia who asked me for them...).

However… If I ever do it again, I will use a better quality of yarn. Acrylic is fine for things meant to be destroyed (Um, I mean well used). I kinda fell in love with this guy. He deserved better from me.

So, here in my sadly neglected blog is a pattern for the “booties” which are his paws! Squee!
Who knew a little intarsia could add such cuteness?

FEET: (Make 4)

Pads of Feet (can be done in a contrasting color!)
Row 1: Long Tail CO 8 sts
Row 2: Sl 1, Purl
Row 3: Sl1, M1, K6, M1, K1 = 10 sts
Row 4: Sl1, Purl
Row 5: Sl1, M1, K8, M1, K1 = 12 sts
Rows 6-12: Sl 1st st Stockinette
Row 13: Sl1, K2tog, K6, PSSO, K1 = 10 sts
Row 14: Sl1, Purl
Row 15: Sl1, K2tog, K4, PSSO, K1 = 8 sts
Row 16: Sl1, Purl
Row 17: Sl1, K7, While keeping live sts on one dpn, Pick Up 20 sts along slipped edge of Foot Pad for Foot (use main color) = 28 sts
Rows 18-23: Place marker at beginning of round & Knit in Round
Toe Decreases:
Row 23: K6, (PSSO, K2tog) four times, K6 = 20 sts
Rows 25-33: Knit in round
Row 34: BO in Knit (Leave long tail for finishing (tail will sew on feet!))

Chart for intarsia paw pads goes a little something like this:

XXXXXXXX
XXXXXXXX
XXXXXXXXXX
XXXXXXXXXX
XXXXXXXXXXXX
XXXXXXXXXXXX
XXXXXXXXXXXX
XXXXXXXXXXXX
XXXXXXXXXXXX
XXXXXXXXXXXX
XXXXXXXXXXXX
XXXXXXXXXXXX
XXXXXXXXXX
XXXXXXXXXX
XXXXXXXX
XXXXXXXX


I made the soles of the paws in black & white (obviously?)

The "Feet" of the paws are done in white & change to orange 1 row after the toe decreases.

Knit 4 rows orange, 2 rows black, 3 rows orange & BO in knit.

I stuffed the legs (little bean bags for the feet are a nice touch...) & sewed them shut before sewing them to the sides of the body.

Really, all you need to do is follow the basice of the Lafcadio Lion pattern I posted earlier with these changes:

Head:

Cast on & work muzzle in white.

Switch to orange & work a 4 rows orange/2 rows black pattern until the end of the pattern for head.

Body:

Cast on in white for belly & continue until 1 row after increases end before switching to orange & black stripes.

I sewed the head onto the body with seam sides together to hide the stripe "jog". However, there are ways to fussy for me to want to use to have a "jog-less" in-the-round seam.

Tail:

CO a 5 stitch i-cord in orange. (Leave a long tai to sew tail onto body.)

work a 4 row orange 2 row black stripe pattern for 4 repeats & end with 4 more rows of orange before switching to 6 rows of white for the tip of the tail.

BO the i-cord & sew end together.

Ears:

CO in black.

Work just as for the lion ears, except for changing to white yarn for row 13.

Crochet the two halves together with black yarn. (Leave a long tail for sewing on the ears.)

I sewed the ears together at the bottom with black yarn before sewing them onto the top of the head.

Eyes:

I made crochet eyes for the Tig, but safety eyes or embroidered eyes would be just fine, too.
(Just be sure if using safety-snap-on eyes to apply them before stuffing or closing the head!)

With White yarn, Ch 4 & close into a loop with a slip stitch.
Make 12 HDC (Half-Double Crochet Stitch) into hole.
Close circle with a slip stitch. (Leave a long tail for sewing on eyes.)

I used black yarn to embroider on pupils once eyes had been sewed onto head.

I make no claims about the accuracy of this pattern.
It is free, so you get what you pay for...

However, I bet even if you or I made a mistake...
The toy would still be loved.

Here he is with his "family":

Yep. Soon I'll write up the pattern for the Pig of Fortune"...
Ah, when will I have the time?
Sam just woke up.

Sunday, November 23, 2008

Soylent Koolhaas!

"It's People! PEEEEOPLE!!! Tell EVERYONE!!"

Sooo. I realized that 3 pair of endpaper mitts by Christmas was an unrealistic goal… sigh.

(I should be putting grades together instead of writing this! I should be house cleaning! I should be doing a lot of other things, but here I am writing about my knitting...)

So, I back up & punt with some stash (Thanks for the de-stashing gift, Colleen!).

Looking yummy so far… The end product is very thick & snuggly!
Well worth the fussiness of the cabling!

I have to say the crown decreases are simply perfect! They are elegant like a math equation… Sometimes I am simply awed by what is possible in knitting.

The actual yardage is something like 140-5 yds, so there are yarn-y leftovers for wrist cuffs or mini mitts…
I will have to experiment with making little tubes of the pattern… I'll print up a little pattern when I finish. The only trick bit will be placing a thumb... Perhaps a little afterthought thumb should poke out of one of the diamonds. We'll see. I can only find out by knitting them up...


Ah well... Back to grading the Art Folders... Bleah.

Saturday, November 8, 2008

Strike While the Iron is Hot!

I must post as fast as I can while the Sam sleeps!

More on my flirtation with crochet:

Ok… I know.

I usually hate crochet.

Why am I doing this?

One answer? LOVE.
(Plus… I think I’m developing a guilty pleasure in amigurumi-style crochet. Sigh. How could anyone fight the cuteness? I’m sooo weak!)

My friend Mary loves all thing Studio Ghibli & especially this kami-wood-spirit-sprite, Totoro.
How could I resist hooking her up for her birthday?

I found a darlin' pattern, that even though it is crochet, is the best version of this character I've found:

http://heavens-hellcat.livejournal.com/420.html

It was a bit tedious through the body, but that is simply because I personally find the crochet process itself tedious... I recommend the pattern to anyone who enjoys it.

However, I now know enough that I’ll probably knit one the next time.
Yeah… this guy is soo cute… There has to be a next time so Sam can have one.

Now I just have to crochet a leaf for his sweet little head (I just improvised a leaf using the ear pattern & then stitching it together to flatten it)…

There. Soooper Cute!


I hope Mary loves it.

Abuse & Neglect...

Oh, my sadly neglected blog...

I have so much to post I don't even know where to start!

I guess I'll start with some back tracking:

I first designed these gloves a a serious modification of the cigar smoking glove from knitty. (other than a few of the counts, it is now quite different… But, you have to start somewhere!)

Foolishly, I made them for a lover who took about as good a care of my heart as he did the gloves. He lost them in the first month of having them as a Christmas gift.
Well, I know much better now…


The version(s) you see here are lady-sized or men’s small of the same lost project made in colors I like far better. After doing the first versions, I learned that if you have a set of 2 sts of black along the gusset edge, the intarsia “jumps” do not show at all & an i-cord style raised edge is created.

That innovation pleased me far better than that man ever did…

In other news... I have lifted my "crochet ban" due to some pumpkin cuteness I found on "them internets"...

Normally, I am not fond of crochet. However, these amigurumi style patty-pan pumpkins are too scrumptious! Sam NEEDED one… Then, my Mother NEEDED one…

Ah… seasonal craft mission creep.

Thankfully, these can be quickly knocked out in an evening (Two (or so) hours at the most, I swear… ).
They use a negligible amount of worsted wt. stash yarn. Great for last-minute gifting!

(There is a useful crochet tutorial on the “video crochet” forum on ravelry... check it out if you are so inclined.)

Other images of Pumpkin related cuteness?

See what a difference a year makes:

This hat was a part of the great pregnant knitathon of 2007…

The hat is a simple 70 st stem hat (see the dred-ly pattern in a previous post if you want the walk-through...) with duplicate stitch jack o’ lantern embellishments.

Sam wasn’t so wild about the pumpkin suit, but he was accepting of the hat a year later…

Man, has that noggin GROWN!

Sunday, October 19, 2008

Lacy Bears?

I've been trying to make lace, lately.

I must be nuts, 'cause lace takes concentration & between teaching my hellions & wrangling my Sam... I've only been able to make the simplest of things work for me.
I have Firmament Pi Shawl & Luna Moth dreams... The gorgeous fiber is even in my stash... However, my reality is much more mundane right now.
With the time & concentration I currently have at my disposal, I've really enjoyed making several hempathy versions of the fabulous & free 'Branching Out' scarf pattern from knitty.com

So, I got involved in the Amazing Lace Swap on ravelry (see previous post) & I hope I did as well spoiling my swap partner as my spoiler did for me:

I included a sure-fire lace maker's pleaser of a skein (800 yds or so) of Zephyr Merino-Silk in a heathered forest green. I also included enough of my beloved Hempathy (in chocolate brown) & the pattern to make a Clementine Shawlette. She mentioned an interest in Bargello & the Clementine has that sort of motif in lace throughout.

I made some beaded items for her: a lace suncatcher & a dichroic glass row counter bracelet (which can be seen in the "group" picture).
I also made up a recipe of dark chocolate mint brownies in honor of her love of York Peppermint Brownies (Not in the picture, but I may post on that later, if anyone's interested...).

In honor of her love of Zuni Bears, I included a hematite Athabascan bear for dream guidance, drew a Zuni bear on a canvas project tote & wrapped her brownies' tupperware in a cotton dishcloth knitted in a Zuni Bear design I charted for her.


Now, I've heard that a smart girl can adapt any chart to lace with yarn overs outlining the image & appropriately placed directional decreases.
So... here's a request for any lace expert out there to help me in my quest for lacy bears!

Anyway. It's a quick, easy & free pattern for those who like to make dishcloths...


In other news... Sam turned one year old on the 8th! Pictures are up on my Flickr if you wanna see. What a year! Everything changed & it was about damn time.
Ah. Love, at last. I'm one lucky Mamma!


I made him a peach-banana muffin with cream cheese icing! (I can post that recipe, too...)
& gave him his Mr. Dangly (I adapted the pattern to be seamless... So, there's another free pattern to come when I get the time to transcribe it from my notes...)

Thanks to All for the Love & Support! You know Sam & I love y'all!

Saturday, September 20, 2008

Amazing Lace Swap Bliss!!!

Bliss!!!

Thank you so much for my splendiferous box o’ lacy treasure!

Note face upon opening box:
lacebox1

The whole of the box is really more than the sum of its parts, but here’s a manifest anyhoo:

-A package of stitch markers Jennifer made her very own self (in the ideal size & style for lace…)
-Copies of two patterns I have in my queue, Firmaments Lace Shawl & Luna Shawl & a dry erase marker to keep my ADD self in the right place
-Charming handmade note cards which are perfect for any & all correspondence to knitting peeps
-Soothing yet invigorating tea to keep me focused as contemplate which project I need to start first.
-6 skeins of my beloved Hempathy in my favorite-est color ever (more than enough to make a Saffron Luna!)
-A ginormous cone of scrumptious Alpaca Silk Ambrosia in a perfect shade of Spicy Burnt Sienna! Ack! SQUEEE! Ack Again!
(I am so happy I did not wake up the sleeping Sam as I did my “Interpretive Dance of Ack & Squee” through my living room… Because that allowed me plenty of time to fondle all that incredibly perfect fiber!)
lacebox2

lacebox3

I am BEYOND happy! Check this goofy mug:

lacebox4

My cheeks are hurtin’ from the smile this box has been giving me since I’ve opened it!
…& it’s a shame hyperbole reads poorly in the virtual world of bloggage, ‘cause I have to say:

Queenmamajen, you put the AMAZING in the Amazing Lace Swap!

You really looked at my wants & needs & used great prudence & discernment in your choices. You have more than renewed my faith in the swap process. (I also have Ania & Mariesa to thank for that, as well...) I feel loved from a distance & spoiled up close & personal!

My needles are sooo ready to click into a serious lace project!

I can only hope to bliss out my own Amazing Lace Swapee as much as you have me.